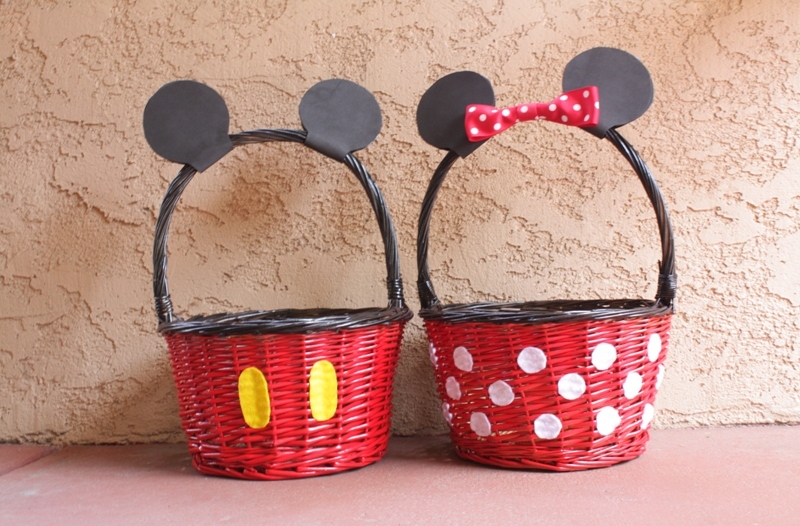
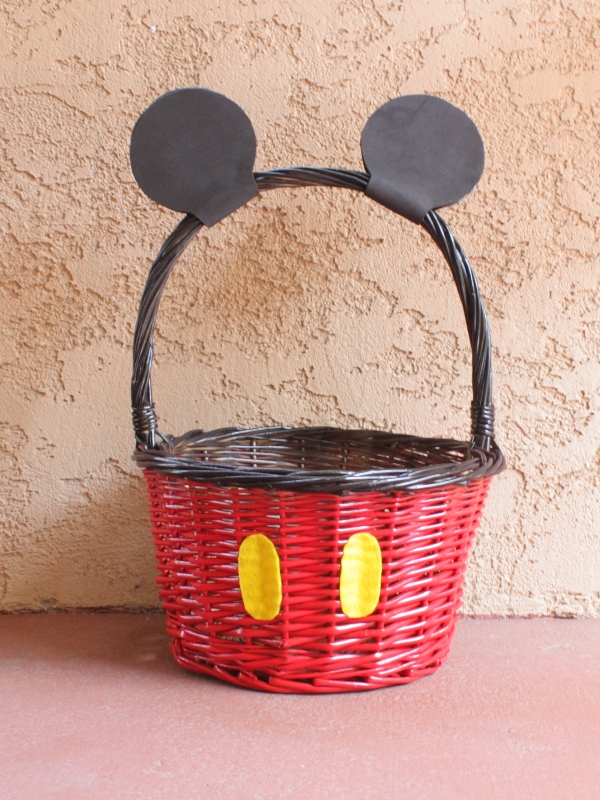
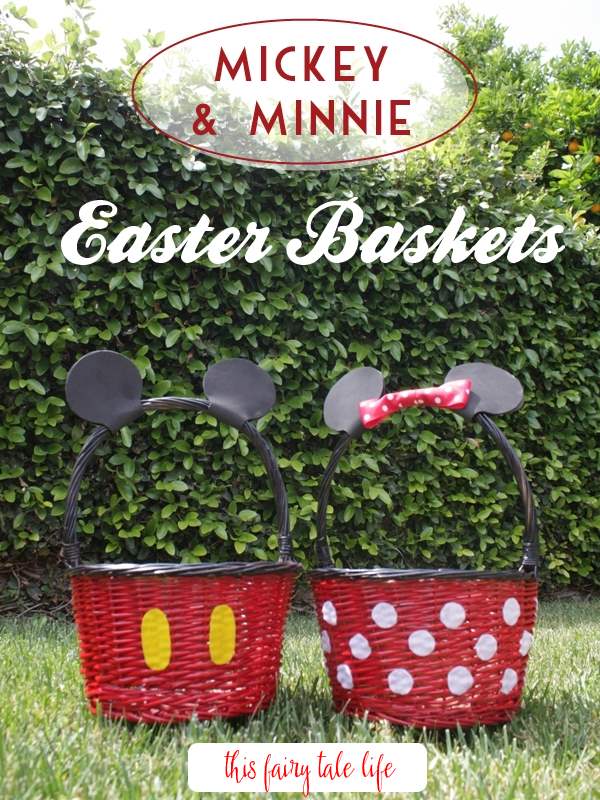
When I first learned our nieces would be visiting during Easter, I immediately thought of Easter baskets. My older niece is three years old and just LOVES Mickey so I knew I had to make a Mickey inspired basket to hold all the toys and treats from Auntie Mindy.
I really like how these Mickey and Minnie Easter baskets turned out and I hope my nieces like them, too!
Supplies
(This section contains affiliate shopping links which means I may earn a commission if you make a purchase)
- Two large wicker baskets with handles (similar)
- Red and black spray paint
- Painter’s tape
- Yellow and white felt
- Black craft foam
- Red polka dot ribbon, at least one inch wide
- Glue gun
- One inch round paper punch OR a quarter, and cardstock (any color)
- White sewing pencil
- Regular pencil
- Scissors
- Small paint brush
- Newspaper or junk mail adverts
Steps
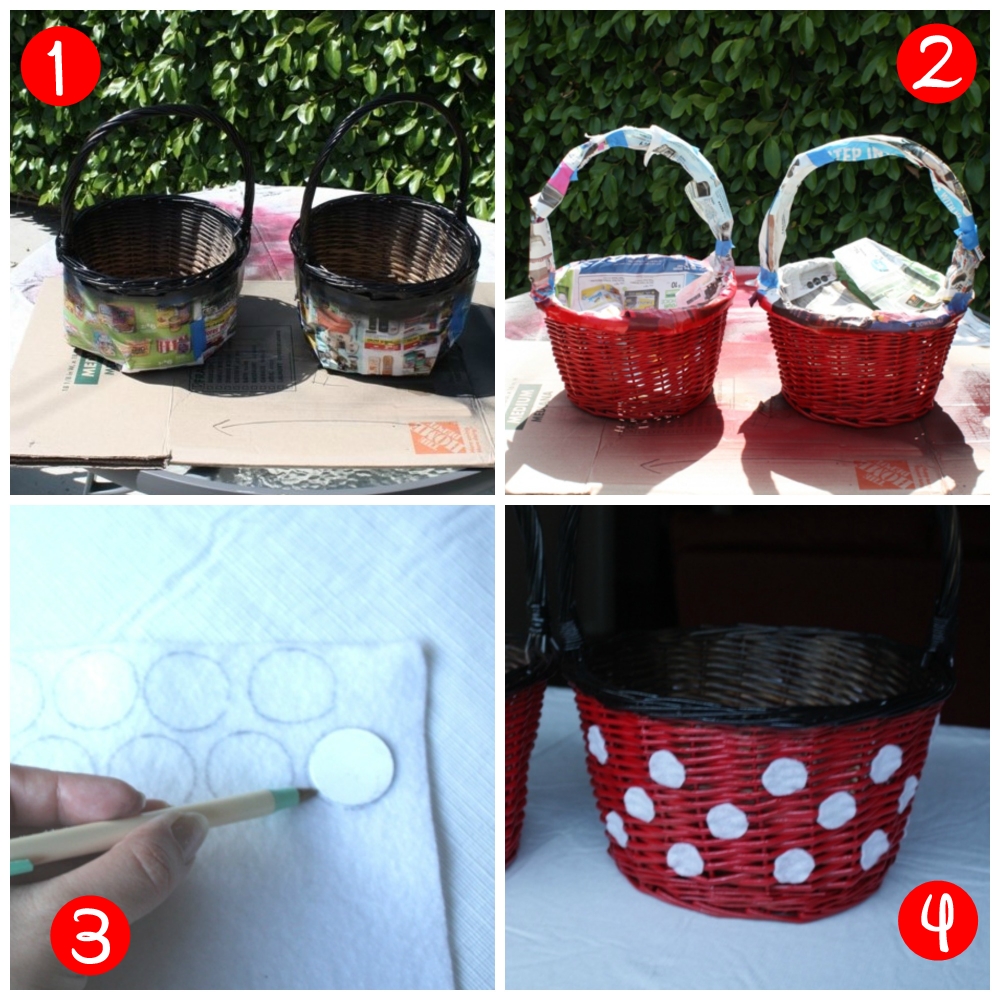
Step 1 – The first step is to paint the top of the baskets black and the bottom of the baskets red. Tape off the bottom of the basket under the ridge and use the tape to conceal the bottom half of the basket with newspaper or junk mail ads. Spray the top of the basket (ridge and handle) with black spray paint. You can also spray inside the basket around the ridge. You don’t have to spray the entire inside because that will be filled with toys and candy!! Allow paint to dry for 30 minutes to an hour. Remove the paper and tape and discard.
Step 2 – Now we are going to tape off and cover the black area we already painted. I used tape and paper to cover the black ridge and handle. Once covered, spray the remaining basket area with the red paint. Allow to dry for 30 minutes to an hour. Remove the paper and tape and discard. If you need to touch up any areas, spray a paper plate with the paint and then quickly use a small paint brush to touch up any unpainted areas. (Note the spray paint will adhere and start to dry quickly so you must move quick, and also your paint brush will probably never be the same afterwards.)
Step 3 – Punch out a one inch circle from the cardstock using the paper punch, or grab a quarter. You are going to use this as your template to create circles with the white felt for Minnie’s polka dot dress. To create three rows on my basket, I needed to trace and cut out 30 circles. I recommend using a pencil for the tracing (even though I used a pen myself). Cut the circles out carefully.
Step 4 – Apply the circles to the basket using the hot glue in a checkerboard type pattern.
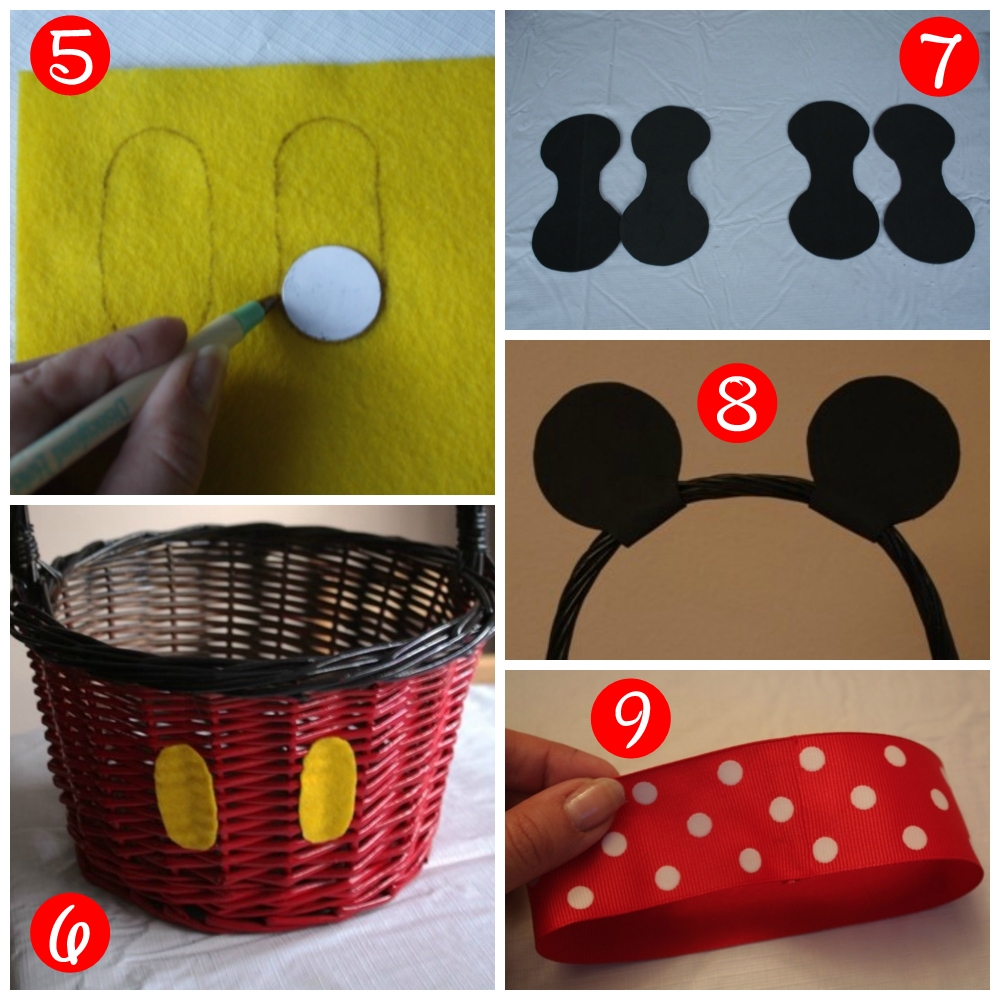
Step 5 – Moving on to the Mickey basket … Cut out oblong circles from the yellow felt for Mickey’s shorts. I used my paper punch as a guide to create the top and bottom rounded edge, then simply connected the two half circles with vertical lines to create a rounded oblong shape. Repeat, then cut them out.
Step 6 – Glue the yellow felt shapes to the basket on the front center.
Step 7 – Using this template as a guide, cut out four mouse ear shapes. The shapes will wrap around the basket handle to form the mouse ears. You will need two per basket for a total of four shapes.
Step 8 – Using hot glue, trace around the edge of one half of the ear shapes, then quickly wrap it around the handle and press the rounded edges together so they line up. Repeat for each ear.
Step 9 – To make Minnie’s bow, measure the red polka dot ribbon to size and then double it. Cut the ribbon, shape it into a loop, and glue together. Pinch it in the center and hold it around the top of the handle between the ears. Use a smaller piece of ribbon to wrap around the center and glue in the back. My ribbon is very wide, so I made my center piece smaller by gluing it in half lengthwise. Then I wrapped that around the bow and glued it together in the back.
I hope you’ve been enjoying the Easter DIYs so far. I have a couple more this week so keep checking back!

