The Divining Rod provided product for this post. All opinions are my own. This post contains affiliate links.
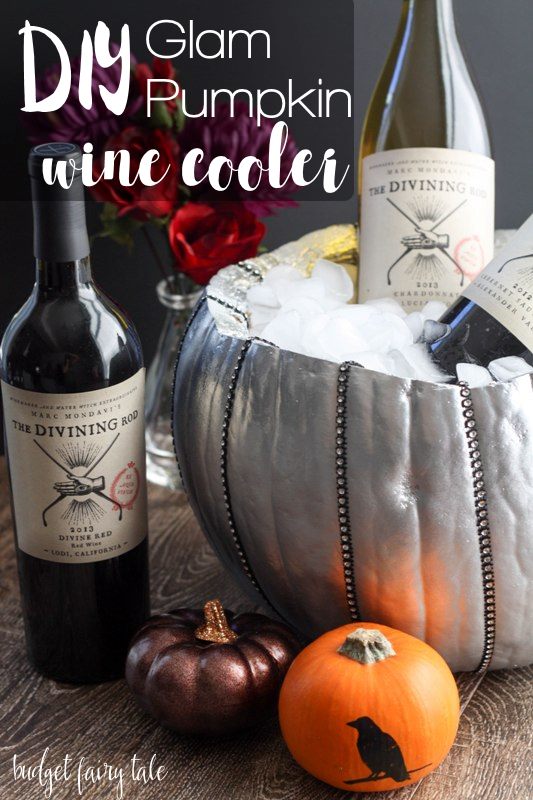
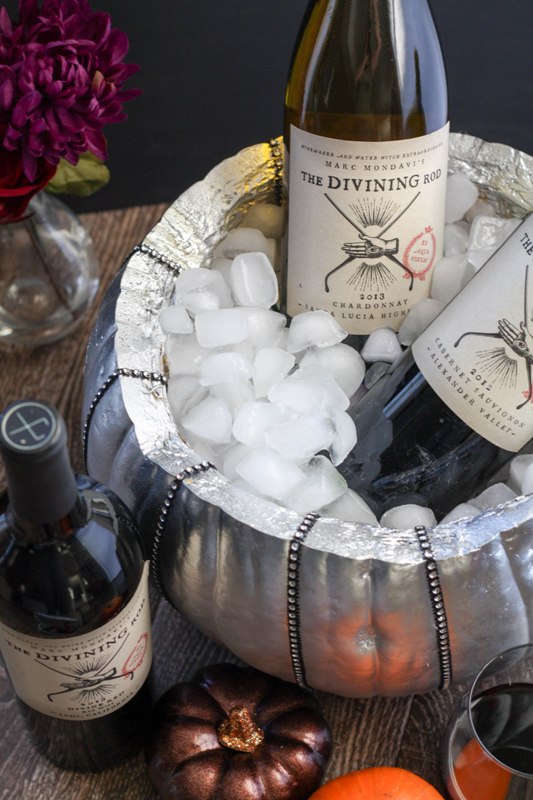
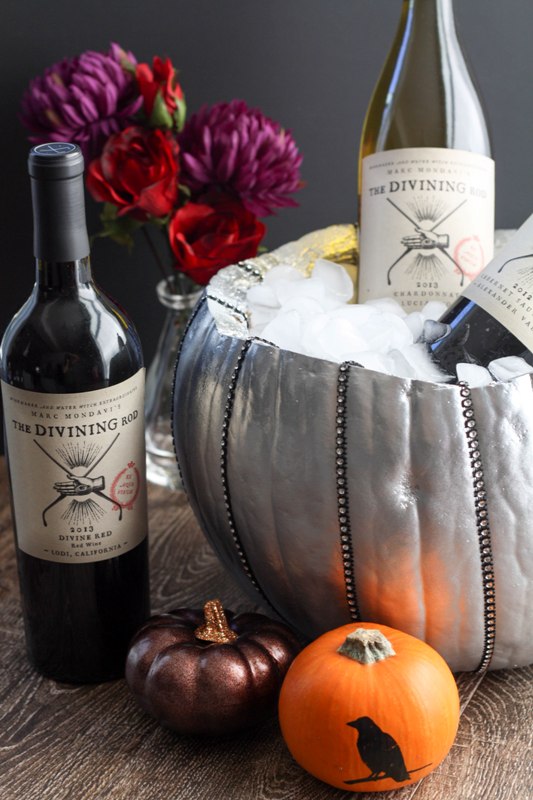
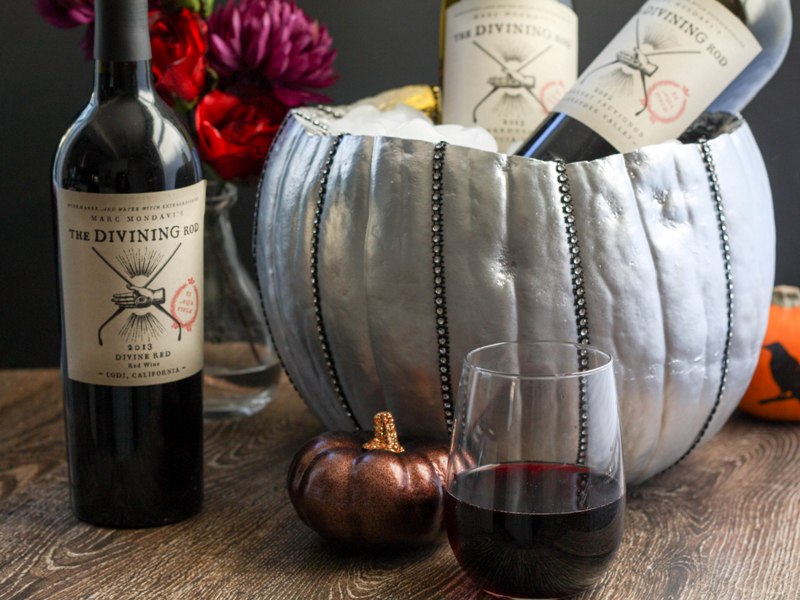
Halloween is upon us! I know some of you may be throwing Halloween parties this weekend so I wanted to get this DIY tutorial up. I’ve seen a ton of these pumpkin cooler tutorials on Pinterest and I’ve been wanting to make one for years. But you know me, it can’t just be a plain pumpkin. I glam’d mine up with some chrome spray paint and rhinestone trim and I just love how it came out. The toughest part of this DIY was gutting the pumpkin … so I made Mr. BFT do that part! Aren’t husbands so handy sometimes? Speaking of Mr. BFT, he made a point to tell me this was one of his favorite DIY items I’ve done. I’m tellin’ ya … the chrome spray paint makes everything look fab. But if you’re in the mood for copper or rose gold, those colors would look just as swell. And the pumpkin cooler is not just for wine, of course … you can chill champagne, beer bottles, and soda, too. (PS – I know it’s kinda sacrilege to chill red wines but you know what? I like all my wines a little cold. I’m not a wine snob so you do whatever pleases you.)
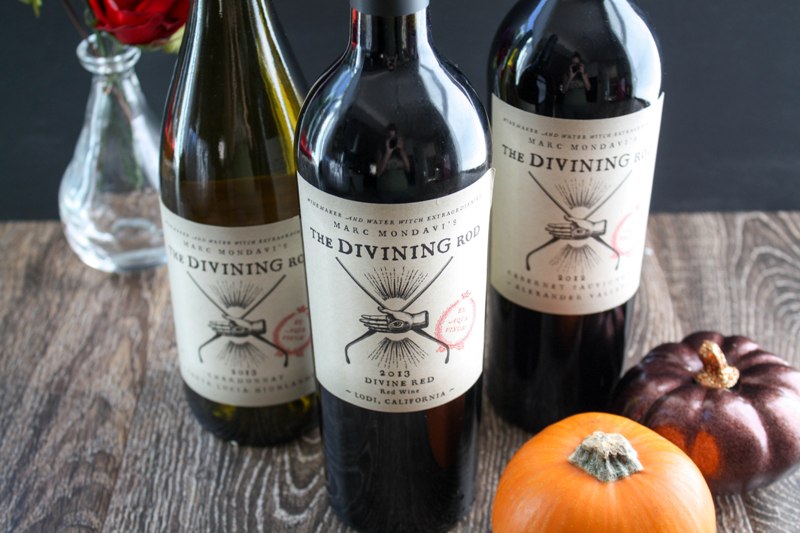
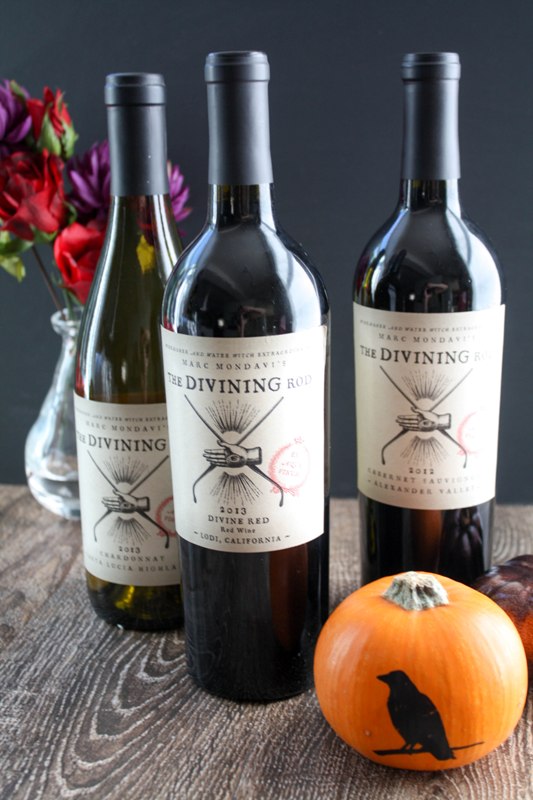
If you’re looking for the perfect wine to serve for your Halloween party, check out The Divining Rod wines. Founder Marc Mondavi is what’s referred to as a “water witch” – he uses diving rods to locate underground water sources. This talent comes in handy when you’re searching the rolling hills of California for the best place to irrigate vineyards. The third eye on The Divining Rod label represents the sixth sense of intuition and the Latin slogan “Ex Aqua Vinum” translates to “from water comes wine.” All-in-all, the story behind The Divining Rod is compelling and their branding is spot on. I did a taste test of their Chardonnay, Cabernet Sauvignon, and Divine Red blend, and I enjoyed all three. And with bottles ranging from $13 – $18, the price is very Budget Fairy Tale friendly.
DIY Glam Pumpkin Wine Cooler
Supplies
- Medium pumpkin
- Chrome spray paint
- Rhinestone ribbon/trim in black
- Glue gun
- Sharpie
- Carving knife
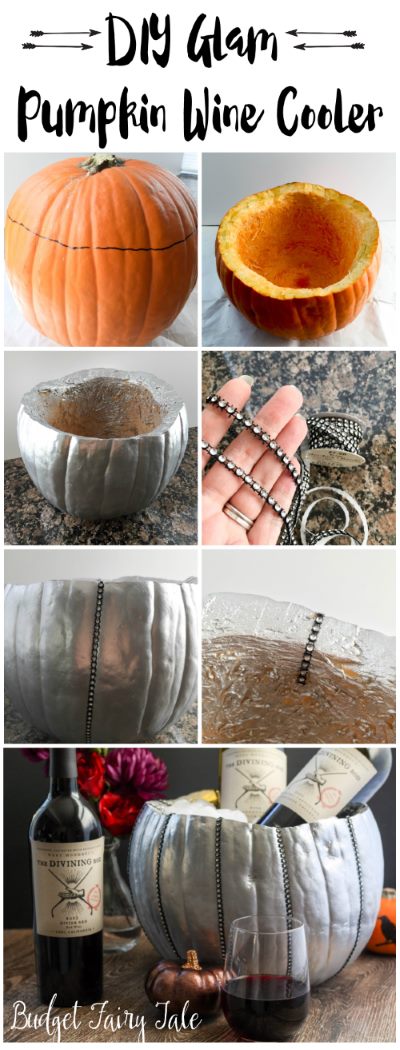
Steps
Step 1 – Mark the cut line on your pumpkin. You’re making a bucket, of sorts, so you’re going to cut a little lower than your standard pumpkin carving line. A good reference is to cut halfway between the top of the pumpkin and the midline. I used a measuring tape and a Sharpie to mark points along the pumpkin, then connected them with a line.
Step 2 – Cut the top of the pumpkin off, right below the line. As always, be careful while cutting!
Step 3 – Remove the guts of the pumpkin and try to make the inside as smooth as possible. I also used a knife to cut along the inner edge of the pumpkin, just to give me some more room inside. When you’re happy with it, completely wipe down the outside and rim of your pumpkin and make sure it’s clean and dry before painting.
Step 4 – Spray the pumpkin with Chrome spray paint. Be sure you paint outside or in a well ventilated area, and protect your work surface. You may also want to use a white primer on your pumpkin first to ensure even coloring. I sprayed the bottom of the pumpkin first, let that dry, then flipped the pumpkin over and sprayed the rest. Spray along the rim, too, and just inside the pumpkin. You don’t have to spray the entire inside of the pumpkin.
Step 5 – When the paint is dry, you can now attach the rhinestone trim. I put the trim along the groves by putting a dab of hot glue inside the pumpkin right below the rim, then wrapped the trim along the groove, under the pumpkin, and up the pumpkin on the opposite side. I then secured that end to the inside of the pumpkin as before. So the trim basically runs along the circumference of the pumpkin. I’m not sure I’m using that word right, but don’t I sound smart?
Step 6 – Repeat Step 5 around the pumpkin as many times as you like. The more rhinestone trim you use, the more sparkly your pumpkin cooler will be!
Step 7 – Once the glue dries, fill your pumpkin with ice and add the wine to chill!
If you make your own pumpkin cooler for Halloween, be sure to tag me in the pictures! Happy Halloweening!
Visit The Divining Rod wines on Facebook, Twitter, and Pinterest.