
It’s Christmas week, and I’m so excited to share these ears I made! I love them so much!
Can you believe these are the first Christmas ears I’ve ever made? Actually, I’ve had some DIY fails I’ve never shared here. But after I made my fall flower crown ears using wire, I had an “epiphany” (get it?) and came up with the idea for these.
I originally thought I was going to have to wrap green garland around regular wire ears, but then I found these amazing, ingenious garland twist ties and they ended up being SO PERFECT.
I wore these to the A Very Merry Holiday Tea Party and got so many compliments.
I would rate making these more on the difficult side, since the little silk flowers are so small. It took a couple hours and I incurred a few hot glue burns on my fingers, but so worth it.
Love them but don’t want to make them? Shop similar ears on Etsy!
Let me know if you try making these yourself! I always love to see the unique variations you guys do with your DIY ears.

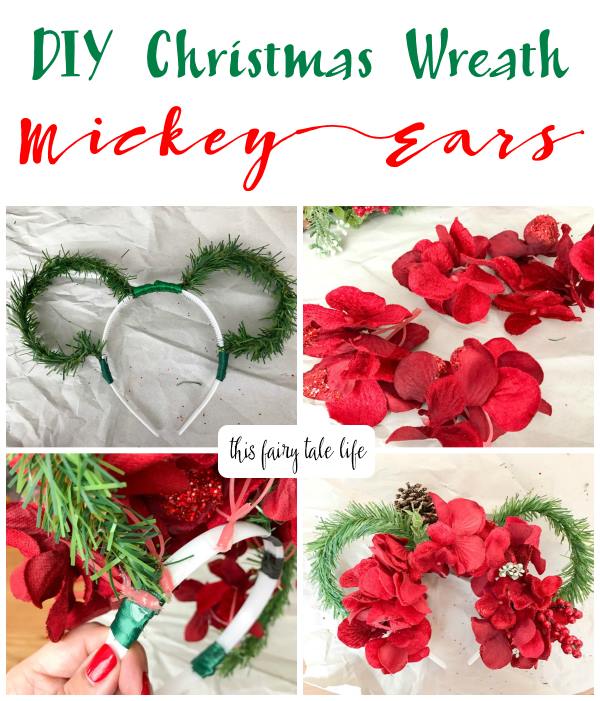
DIY Christmas Wreath Mickey Ears
Supplies
- Two (2) Christmas Garland Ties (I included an Amazon link but I found mine at Target in the holiday wreath/garland section for around $5 for a pack of 10; I also saw them at home improvement stores – Lowes and Home Depot. They may be very tricky to find outside of the Christmas season.)
- White headband (Could do a holiday color like red or green, but it will be mostly covered up when you are finished with the project.)
- Hot glue gun
- Silk red hydrangeas (I found some at Michaels that were made with a velvet finish with red glitter on them, perfect to add some texture)
- Black masking tape (3/4 inch)
- Needle nose pliers/wire cutter combo
- 1/2″ Green ribbon
- (Optional) Silk holiday accents (I used pinecone and mistletoe; it all came together in a silk arrangement.)
Steps
Step 1 – The first step is to shape your garland/wire ears. I wanted to make my ears a little bigger than the traditional ears and I found a pickle jar was the perfect size. If these seem a little big, try a wine bottle. Look around your home and get creative as to what you can use as a size guide!
Wrap the garland/wire around the jar or bottle until you have a complete circle, and trim the wire with about 2 inches sticking out on both sides. Do this twice for your two ears.
Step 2 – Place your garland/wire ears using a pair of official Mickey ears as your guide. Once you have the right placement on the headband, trim the “edges” of the ears to about one inch, cut the excess “pine needles” off the wire, then use a piece of black tape to secure the edge to the headband. Repeat on the other side of the ear. Then repeat for the second ear.


Step 3 – The black tape is a little ugly, so I used some green ribbon to cover it. Just cut the ribbon about 4 or 5 inches, then secure the ribbon underneath the headband with glue, and wrap it around the black tape so the black tape no longer is visible, then glue the end of the ribbon underneath the headband. Repeat for each section of black tape.
Step 4 – Time to start gluing flowers! Take off the hydrangeas from the stems; you’ll find they come apart almost like petals. Trim down the stem to about one centimeter and start gluing them one-by-one to the headband. I like to start near the ears and work across the headband into the center. Just start gluing them down, then you can go back and fill in gaps later. Don’t forget to do the backside, too!
Step 5 – Add some optional accents. I added a little pinecone, a sprig of holly berries, some white mistletoe, and a bit of greenery.

Thanks for reading, and happy holidays!