Yesterday was our second wedding anniversary! I can hardly believe it has been two years already. It has truly been the best two years of my life, and I can’t wait to see what the future holds for us. We spent the weekend at Disneyland and then on Monday I spend most of the day battling a sluggish computer! I decided to take a day off to try to delete some files and programs and do a massive cleanup. Then in the middle of it all my DVD disc drive crapped out, so I had to pull out my old MacBook and start transferring files and burning discs that way. NOT FUN but it needed to be done. So I’m a little behind with my posts. I’m going to post a full recap of our anniversary weekend but I want to share this second anniversary gift DIY project now because I’m really excited about it.

Okay, true confessions time: For several weeks I thought the traditional second anniversary gift was wood. It’s totally not. It’s cotton. I had a great DIY planned with wood and a couple days ago I thought to check the traditional gift list again and discovered my mistake. Wood is for the fifth anniversary so I guess I’ll save all the wood DIY supplies until then.
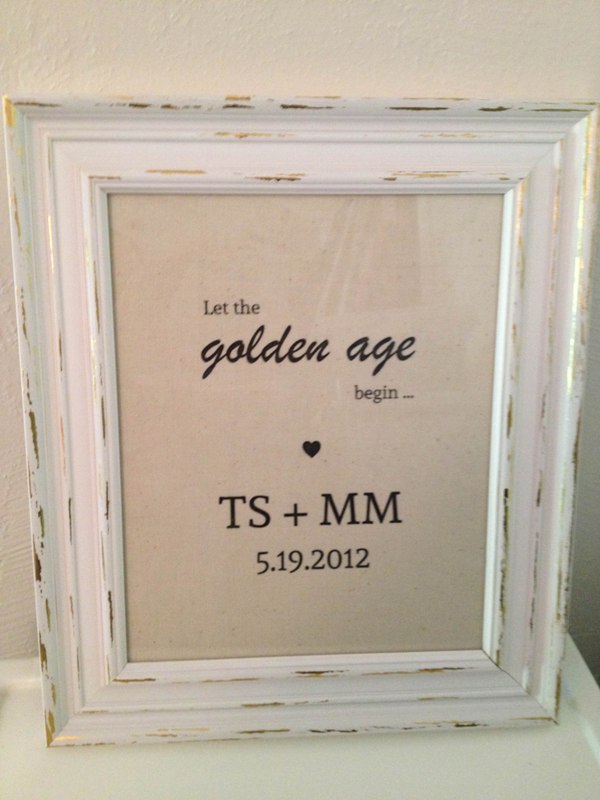
I did a bunch of searching online to try to come up with a clever second anniversary gift incorporating cotton. I wanted it to be something I could make myself, mostly because it was suddenly two days before our anniversary and there was no time to order anything. I kept stumbling upon printed cotton signs and wondered if I could somehow make one myself. With some additional sluthing I came upon this tutorial which made the whole thing sound actually painless. I gave it a shot, and I’m SO happy with the results! IF I had the time to do it over again, I would make my print fill the frame a little better (maybe add a decorative border). I was going to do a gold leaf mat around it but it turns out gold leaf and I don’t get along. That’s a few hours of my life I’ll never get back. So maybe in the future I’ll add something to it but overall I like how this came out. AND Mr. BFT really liked it, too! He said he likes it just the way it is. Awwww.
DIY Cotton Printable Sign
Supplies:
- Cotton fabric. I found an unbleached 100% cotton remnant at my local Joann Fabric during a 50% off sale. Score!
- Picture frame
- Printer
- Scissors
- Spray adhesive
- Sheet of cardstock
Steps:
Step 1 – The first thing you should probably do is design your printable. I did a VERY simple design using just text and a WingDing heart. I chose a lyric from our first dance song, followed by a heart, then our initials and wedding date. I made the design in Paint.net (freeware Photoshop). I then resized it into an 8×10 graphic because that was the frame I had. I found a gold leaf frame and thought it would match perfectly for our first dance lyric. Remember to save your graphic as you go along!
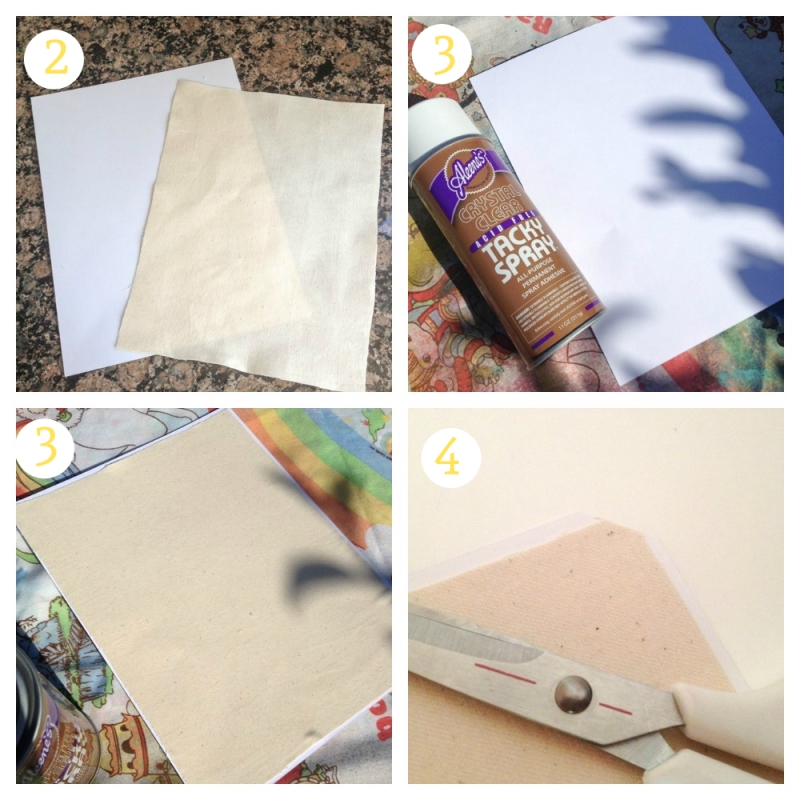
Step 2 – Iron your fabric and cut a piece the same size as a standard cardstock, 8.5 x 11. Even if your frame will be smaller, you will have better printing results if your fabric is the same size as your cardstock.
Step 3 – (Remember to use spray adhesive in a well ventilated area, preferrably outside on a protected surface.) Spray one side of your cardstock with a light coating of spray adhesive. Immediately apply the piece of fabric to the sticky side of the cardstock, making sure the fabric is centered. THIS IS IMPORTANT. Work quickly but carefully or else your print will be crooked! If there are any air bubbles, try to work them out to the side so your fabric/cardstock is now completely flat.
Step 4 – Snip the corners of your fabric/cardstock just a little. I read on the internet this will minimize the chances of our fabric getting jammed in your printer. Also make sure your corners are completely stuck together.
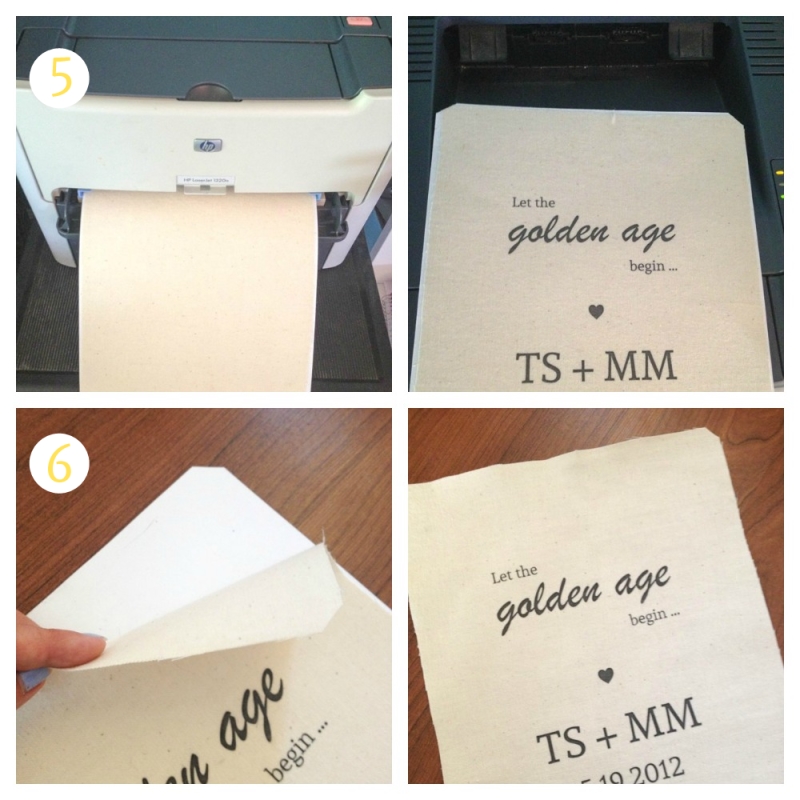
Step 5 – You’re ready to print on your fabric! Feed the fabric/cardstock into your printer’s manual feed per your printer’s directions, and click “print” on your graphic. If all goes well, your fabric/cardstock will run through the printer with no issues, and you’ll now have a nice printed image on your fabric!
Step 6 – Separate the fabric from the cardstock as quickly as you can. The longer they are stuck together, the more they will adhere. Just peel slowly.
Step 7 – Put the fabric in your frame (or cut to size and then put in your frame). Make sure the fabric is centered before you completely close it. If you want, you can tape the fabric to the frame’s backing to ensure it stays centered.
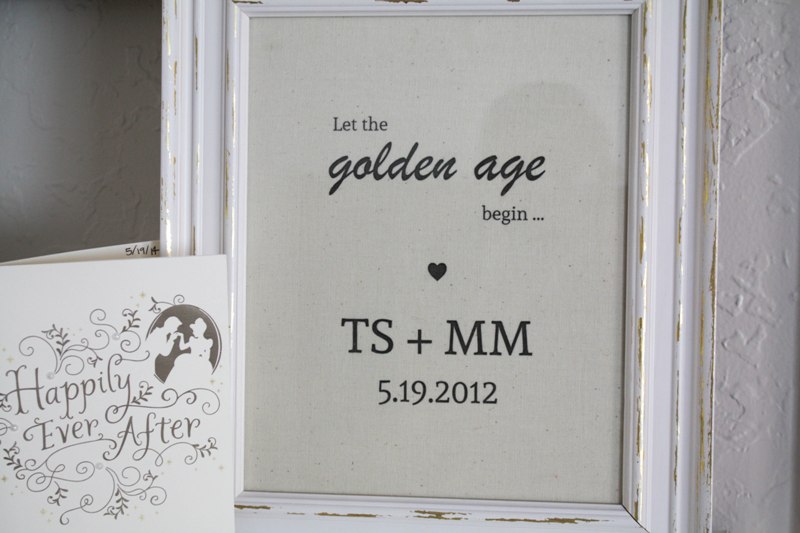
Enjoy your cool new fabric art! A couple notes on this project: I have a laser printer but I read it works with inkjet, too. But I am not responsible if something goes wrong and the fabric breaks your printer, so craft with caution! I think it would be really fun to print a cute saying or graphic on a colorful piece of fabric. Hmmmm, maybe my next DIY for Inspired By Dis will involve Disney fabric. The possibilities really are endless!
Here are some other ideas for second anniversary gifts incorporating cotton:
- Custom pillows or pillow sheets
- A cozy throw blanket
- A meaningful t-shirt
- Pajamas
- New bed sheets
- Monogrammed bath towels
- Personalized robes (like the ones at the Disneyland hotels)
- Cotton scented candle
- Slippers
- Bow-tie
- Personalized apron
- Cotton boxers and/or lingerie
- A hammock (if you have the outdoor space!)
- Tote bag filled with goodies
- A new quilt or comforter for the bed
- Cotton candy!
Do you have any Cotton Anniversary gift ideas to add to the list?