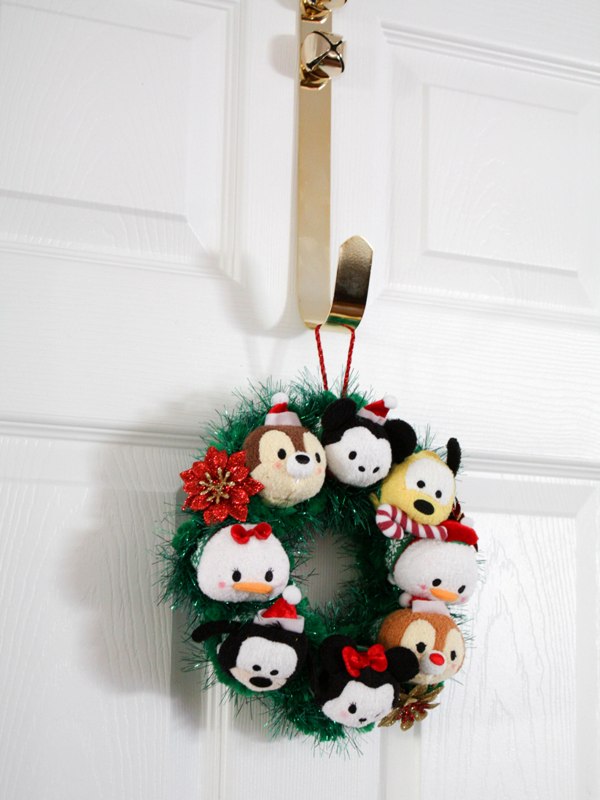
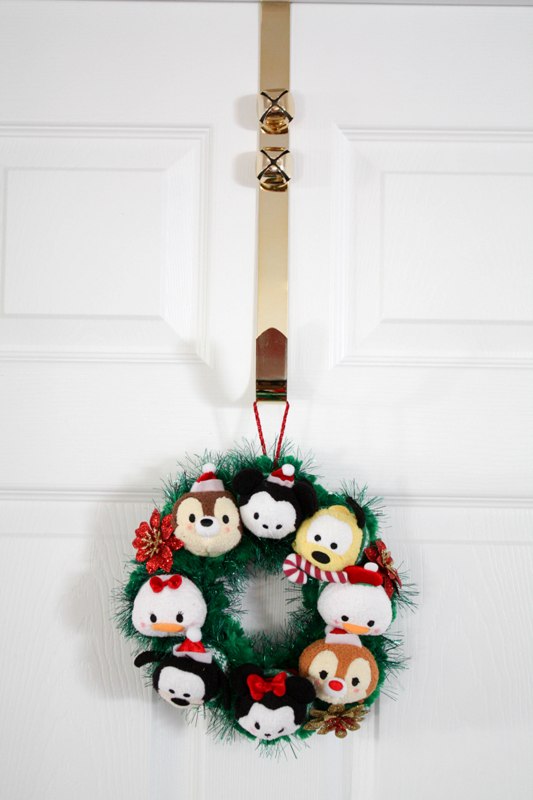
Happy holiday season! I recently saw a picture of an adorable Christmas Tsum Tsum wreath, available only at Disney Store Japan of course. Why do they get all the cute stuff?! I studied it and decided to try to make my own, and I am pretty pleased with how it turned out! This project is a little bit intensive but isn’t it so adorable? It’s worth giving up an afternoon to make. And I’m so glad I snagged a set of the holiday Tsum Tsums the day they were released because they have been sold out since! I’m hoping the Disney Store will restock them, but for now you can look for a set on eBay. Of course, you don’t have to use holiday Tsums! You can use whatever mini Tsums are already in your collection and this wreath will be just as adorable. And, I know wreaths are traditionally a holiday decoration, but why make it solely for Christmas?! A holiday-neutral wreath would look great hanging up all year long. What a cute way to display your collection all over the house!
DIY Tsum Tsum Wreath
Supplies
- Green Giant pipe cleaner (2 packs, about 13 feet total)
- Green Eyelash yarn
- Green floral wire
- Wire cutters
- Red cord or ribbon
- Scissors
- Mini holiday ornaments
- 8 Mini Tsum Tsums
Steps
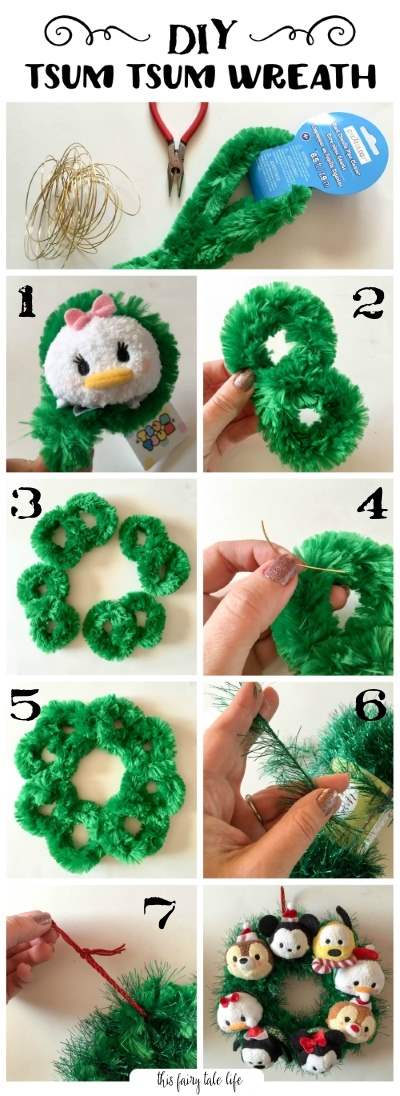
Step 1 – Start by making “figure 8s” with your giant pipe cleaner. Use a mini tsum to get the right size for the loops. Wrap the pipe cleaner around the tsum so that the tsum fits snuggly in the loop. You don’t want it to be too tight, but not too loose either. The tsum should be able to slide in easily but not fall out if you tip the loop to the side. When you have the right size, wrap the pipe cleaner around itself a couple times so the loop is secure (Fig 1). Do this twice and snip the wire so the pipe forms a “figure 8.” (Fig 2) Make sure you bend the end of the wire back under towards the wreath, so it won’t stab your Tsums or your fingers when you’re handling the wreath after it is completed.
Step 2 – Repeat Step 1 four times so you have 4 “figure 8” shapes. (Fig 3)
Step 3 – Using the floral wire (Fig 4), connect all of the “figure 8” shapes so they form a round wreath shape. (Fig 5)
Step 4 – Repeat Steps 1-3. You should end up with two identical wreaths like the ones shown in Fig. 5. The reason you need to make two is because one wreath alone will not support the weight of the 8 tsum tsums.
Step 5 – Lay one wreath on top of the other so they are even, and use the green eyelash yarn to attach the two wreaths to each other (Fig 6). What I did was cut around 2 feet of yarn and then tied it around the two wreaths. Then I wrapped the yarn around the wreath loops over and over, then tied the end. I repeated this as many times as necessary. If you do not have any eyelash yarn, you can simply use the green floral wire to attach the two wreaths to each other in a couple different spots. However, I like the effect of the eyelash yarn; it gives the wreath a little more shape and gives the appearance of pine needles.
Step 6 – Cut about 6 inches of the red cord or ribbon and loop it through one of the wreath loops, then tie the ends together (Fig 7). This will be how you hang the wreath.
Step 7 – (Optional) Add some small mini ornaments or whatever decorations you want. I used three tiny Christmas themed ornaments with wire already attached, and just wrapped the wire around a section of the green wreath.
Step 8 – Gently push a mini Tsum into each loop about half way, so the Tsum is snugly in place and the face is visible through the loop.
Your wreath is complete! Hang it from a nail, thumb tack, or wreath hanger.
Remember your Tsum Tsum wreath is for indoor display only! Which mini Tsums will you display in your wreath? Remember if you make this project, be sure to tag me in your photo on Instagram or Facebook so I can see your creation!

