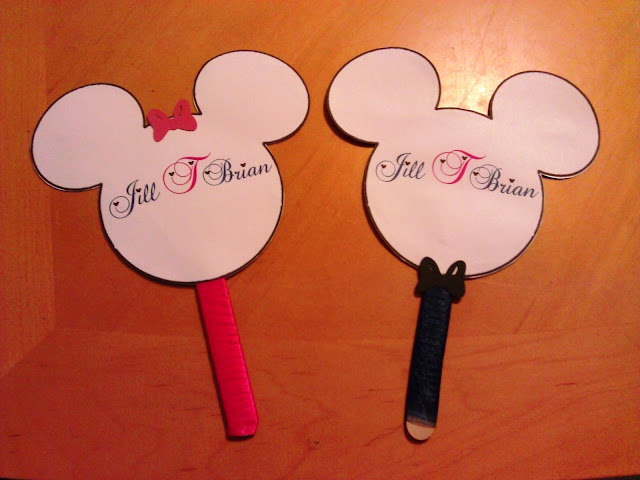
Hello everyone! Today we have another super fab DIY project from real Disney bride Jill! These Mickey Fans are perfect for a summer outdoor wedding AND they could double as programs. I love dual purpose wedding crafts.
I started by using a blank Mickey head JPEG. I opened it in a paint program (like MS Paint, or a photo editing program should work too) and added our names in Baroque script. Then I added in Mickey heads and shrunk them down really small and added them to our names to make “hidden” Mickeys. This became the front of the fan. I copied and pasted the stretched Mickey head – – very important to make sure they are the exact same size – – into another file and added a Bible verse on love. This became the back of the fan. I printed one side of each onto a heavyweight paper and then carefully cut each side out. Of course if you have a Cricut you can just buy the Disney disc and skip over this part.
After cutting them out I lined the back and front up perfectly and secured them together using Zots glue dots. I put one in the middle of each ear. Then I added a stick (I used Woodsies) to each fan and secured it on both sides with more Zots glue dots. Then I used a photo quality gel glue pen and put a light layer of glue on the edges of the mickey head and pressed the front and back together. I let it dry overnight. The next day I used 5/8″ ribbon to wrap the handles. I used Zots glue dots for this too. I put three dots on the back side of the stick and wrapped the ribbon at an angle all the way down to just before the bottom. I pressed the ribbon into the glue dot and added a little of the gel glue to secure it at the bottom.
Then, using my Mickey head hole punch and some sparkley paper, I punched out some Mickey heads and glued them to the bottom of each fan. This helped to cover up the messy seam left where the ribbon ended. Finally, I added a bow tie cut out to some and a hair bow to others. It was labor intensive but so much fun for a Disney wedding!


