You asked, we listened! A lot of you wrote to me about the bridal shower we featured last week, especially how to make the totally cute Mat Hatter centerpieces. The bride Wendy and her mom made everything themselves, and Wendy was kind enough to type up a tutorial! Thank you Wendy! If anyone tries this project, please share your photos with us!
 |
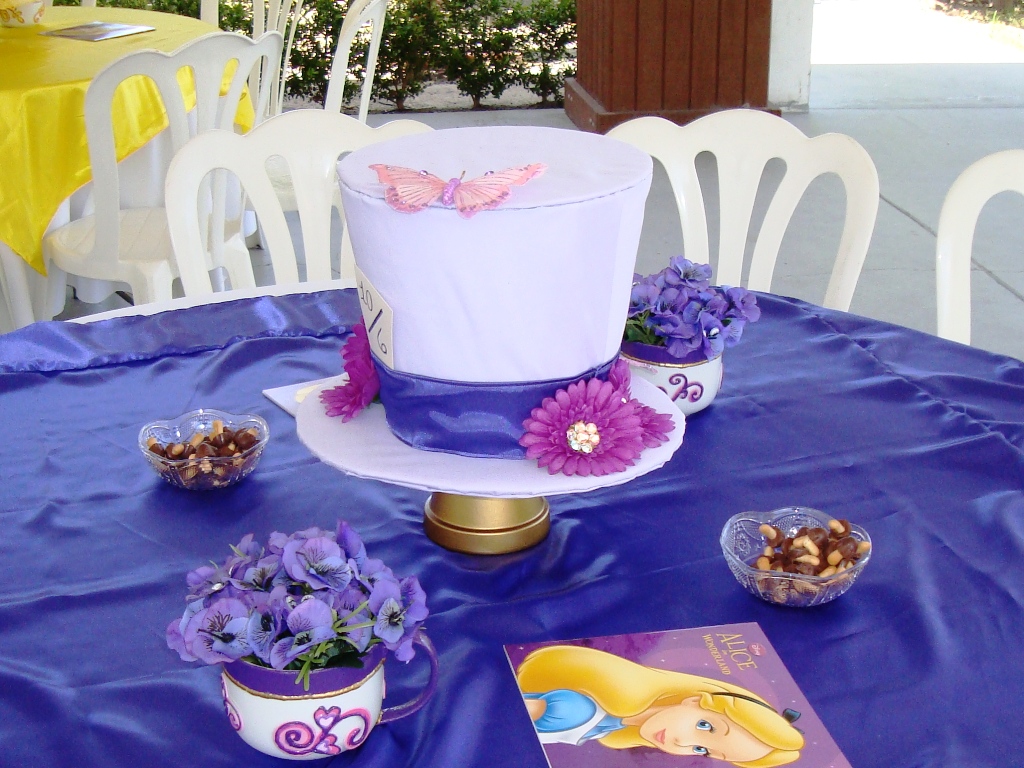
| All photos in this post are from my personal collection |
Supplies:
Bucket (this will serve as the bulk of the hat)
Cardboard (this will be the top and the brim of the hat)
Fabric
Darker fabric or ribbon for the trim
Felt
5 silk gerbera daisies
2 silk butterflies
Gold acrylic paint (we used bottle and brush)
Rhinestones (Optional)
4″ Clay Pot
Matching Clay Saucer
Low Temp Glue Gun (LT)
High Temp Glue Gun (HT)
E6000 Glue
Paper for pattern
Getting Ready Instructions:
1. Make a pattern of the sides of bucket. – Using a pencil, mark a spot on the bucket and roll the bucket on the paper all the way around, while tracing the outside of the bucket. It should make an arc pattern that could wrap around the bucket.
2. Cut felt to exact size of the pattern adding 1″ for over lapping on one end.
3. Cut fabric for around sides of bucket 3/4″ to 1″ bigger all the way around pattern.
4. Cut 1 piece of cardboard the same size as the top of the bucket (put the bucket upside-down on the cardboard and trace around the opening of the bucket)
5. Cut 1 piece of cardboard about 2″ larger than the top of the bucket (you can use the cardboard you just cut in Step 4 as a guide, just measure it two inches bigger around). This will become the brim of the hat. (Do not attach anything to bucket yet.)
6. Cut 1 circle of felt to match each cardboard piece in step 4 & 5.
7. Cut 1 piece of fabric for the top of the bucket (Step 4) 1″ larger than the cardboard.
8. Cut 2 pieces of fabric for the brim ( Step 5) 1″ larger than the cardboard.
9. Paint Clay Pot and Saucer (we used gold paint.) Once the paint is dry, glue the saucer to the bottom of the pot (E6000 glue). This will be used upside-down as the base of the centerpiece for stability.
10. If using rhinestones in the center of the flowers, glue in stones with E6000 before attaching the flowers to the hat so they can dry before assembly. Take off the stems of the flowers so they can lay flat.
11. If using fabric for the colored trim around the hat, either hem the edges or fold the edges and glue down (LT).

Assembly Instructions:
1. Wrap the bucket with the corresponding felt you cut out; overlap at the end and glue (LT).
2. Now wrap the bucket with the corresponding fabric, on top of the felt, and fold raw end under and glue along the seam (LT).
3. Fold the hanging fabric into the bucket and glue (LT) inside the bucket, easing the fabric in so the fabric on the outside of the bucket stays smooth.
4. Turn the bucket over and glue (LT) the bottom edge of fabric to the bottom of bucket, keeping the side fabric smooth.
5. Center the smaller cardboard circle and matching felt on the inside of the matching fabric (for the top of the bucket). Keeping the fabric smooth, fold the edges to the underside of the cardboard and glue (LT) in place.
6. Glue (LT) this fabric covered cardboard circle to the top of the bucket along the edge. (This will become the top of your hat centerpiece so make sure it looks nice!)
7. Repeat step 5 to the brim piece of cardboard (larger circle). After the first fabric and felt are glued on, turn over and glue the other piece of fabric to the bottom, folding the fabric under at the edge (DO NOT overlap). This will create a nice seam for the brim of the hat.
8. Glue (HT) the bottom of the bucket to the brim, centering the best you can. Now it should look like you have a hat!
9. Glue (HT) the hat to the upside down clay pot/saucer centering the best you can.
10. Glue (LT) the hat band (ribbon or different colored fabric) to the hat, folding back 1/2″ for a finished look.
11. Glue (LT or HT) the flowers and butterflies in place.
12. Don’t forget the “10/6” tag!
Final step: Pat yourself on the back for a job well done!