• About Me
  • Resources
  • Submissions
  • Advertising/Disclosure
  • Privacy Policy
  • Skip to primary navigation
  • Skip to main content
  • Skip to primary sidebar

This Fairy Tale Life

Your Fairy Tale, Your Way

  • Latest Posts
  • Disney
    • Disneyland
    • Disney’s Fairy Tale Weddings
    • News
  • Travel
  • Weddings
    • Considering a Disneyland Wedding?
    • Real Weddings
    • Engagement Pictures
    • Honeymoon
    • Our Wedding
  • Blogging
    • Social Media Consulting
  • Lifestyle
    • Wellness
    • Recipes
    • DIY
  • Show Search
Hide Search
Home » DIY » Diamond “D” Disneyland 60 DIY Shirt

Diamond “D” Disneyland 60 DIY Shirt

Last Updated May 26, 2017. Published July 15, 2015. By Mindy

45 Shares
Tweet
Share1
Pin44
Share

This post contains affiliate links.

Diamond

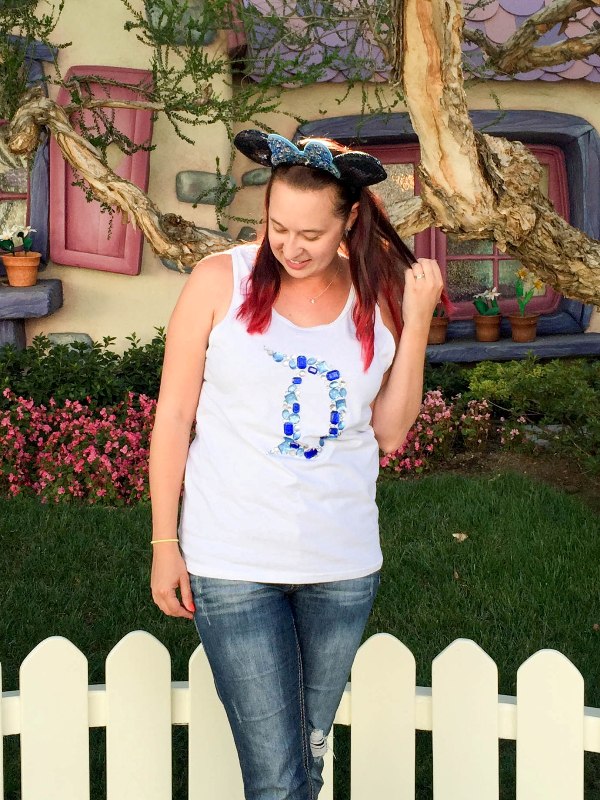
I’m totally in love with all of the new Disneyland 60 merchandise, but so not in love with some of the prices. There was a really pretty blingy tank top I had my eye on, but when I got to Disneyland I saw the price tag – $80! For a tank top, seriously?? I love you Disney, but ain’t nobody got money for that. I decided to make my own sparkly tank top that evoked the spirit of the Disneyland 60th anniversary celebration for under $20 using supplies from the craft store.

Diamond "D" Disneyland 60 DIY Shirt

Diamond “D” Disneyland 60 DIY Shirt

Supplies:

  • White T-shirt or tank top – prewashed (similar)
  • Blue acrylic gems (I used Bead Landing brand in assorted blues, purchased at Michaels – these on Amazon are slightly different in color but should work)
  • Clear “crystal” acrylic gems
  • E6000 glue
  • “D” stencil
  • Cardboard
  • Scissors
  • Painter’s tape

Steps:

Diamond "D" Disneyland 60 DIY Shirt

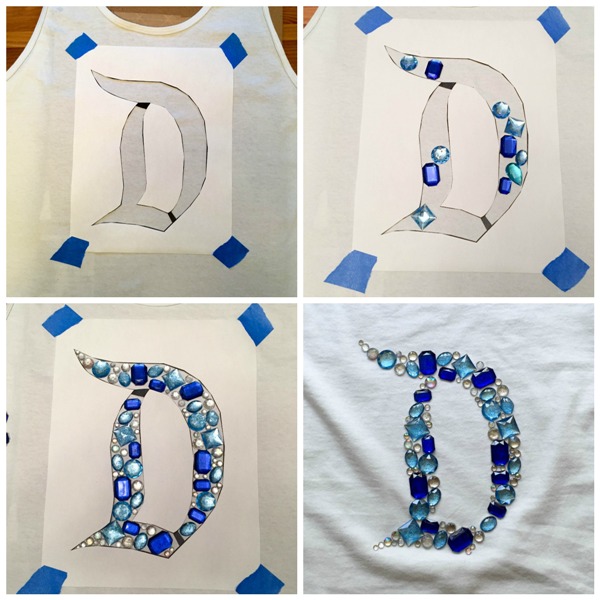
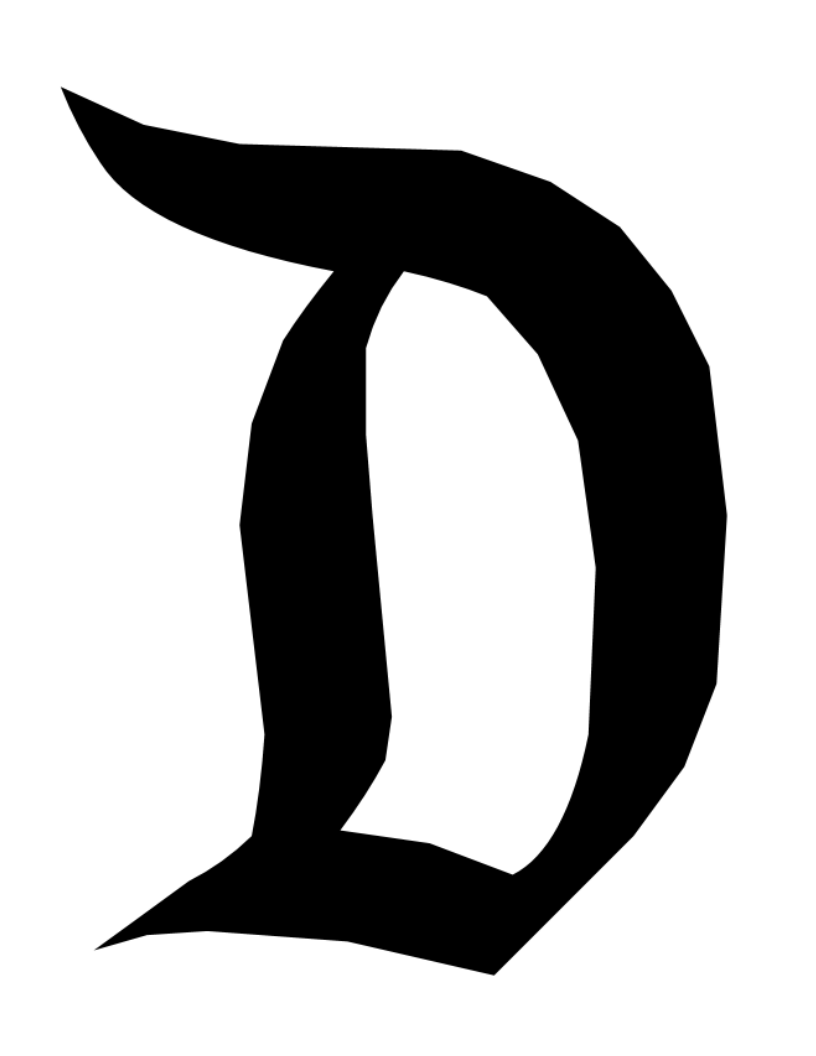
Step 1 – Print out this “D” image (font is “Started with a Mouse” in case you want to do it yourself) and cut out the “D,” so you’re left with a stencil. Be sure to leave tiny bits of paper attaching the center of the D to the rest of the paper. Use the painter’s tape the stencil to the center of a white T-shirt. For mine, I used a tank top, because I wanted to wear it during the summer when it’s really hot!

(Click the thumbnail below to open the larger image in a new window, then print from there or save the file to your computer.)

D stencil

Step 2 – Place varying size and shades of blue gems into the cut out of the “D” stencil, filling in the space as best as possible. You will use smaller gems to fill in the rest of the space later.

Step 3 – Start gluing down the gems to the shirt, one by one. The glue adheres quickly so be sure you’re placing the gem down in the exact spot you want it, because you only have a second or two to move it around.

Step 4 – Once you have glued down all of the larger gems, start filling in the space with the smaller gems.

Step 5 – Remove the paper stencil, lifting carefully in case some of the paper is stuck to the shirt because of the glue. Fill in the empty spots left by the tiny strips of paper connecting the center of the “D” to the outer stencil. Allow the shirt to dry overnight before wearing.

E6000 glue has a very strong odor, so if you have a sensitive sense of smell, you may need to wait a couple days before wearing. And always use E6000 glue in a well ventilated area and take breaks!

Diamond-D-Disneyland-60-DIY-shirt-28

For this project I used blue rhinestones because it’s the color of the Disneyland 60th anniversary celebration, but you can use whatever color rhinestones your heart desires! Also, can you spot the Hidden Mickey in my design?

Diamond "D" Disneyland 60 DIY Shirt

Enjoy your new top!

45 Shares
Tweet
Share1
Pin44
Share

Filed Under: DIY

Reader Interactions

Comments

  1. Lisa says

    July 15, 2015 at 11:32 pm

    This turned out so great!!!

    Reply
  2. Hope at Disneyland says

    July 16, 2015 at 10:36 pm

    Your top looked so great! I actually liked it better than the ones for sale at Disneyland. 🙂

    Reply
  3. Linda says

    July 31, 2015 at 1:41 pm

    I Love, Love, Love this shirt!!! It looks so awesome! In fact I love it so much I made one of my own and put it on my blog. Thank you so much for sharing!

    Reply
    • Mindy Marzec says

      July 31, 2015 at 1:45 pm

      They look great, thanks for sharing!

      Reply

Leave a Reply Cancel reply

Your email address will not be published. Required fields are marked *

This site uses Akismet to reduce spam. Learn how your comment data is processed.

Primary Sidebar

  • Email
  • Facebook
  • Instagram
  • LinkedIn
  • Pinterest
  • Twitter
Collage of media logos where this website has been featured

Valentine’s Day

20 Tips for Surviving Valentine's Day When You're Really Depressed

20 Tips for Surviving Valentine’s Day When You’re Really Depressed

10 Disney Valentine’s Day Ideas

Conversation Heart Mickey Ears Tutorial for Valentine's Day

Conversation Heart Mickey Ears Tutorial for Valentine’s Day

Fall in Love with Valentine’s Classic Afternoon Tea at Disneyland Hotel

DIY Ombre Heart Valentine’s Day Mickey Ears

All Things Disney

SOUL Printable Activities and Movie Review

SOUL Printable Activities and Movie Review

Collage of Disney Gifts for Women

12 Cozy Disney Gifts for Women

Gold wrapped present

Disney Stocking Stuffer Gifts for Adults

Collage of The Child products

I Would Like to See The Child – Gift Guide for The Mandalorian Fans

Five different color cocktails in a row

Make Oga’s Cantina Cocktails at Home!

Popular Posts

2019 Disneyland Weddings Showcase Recap2019 Disneyland Weddings Showcase Recap47K Total Shares
101 Handmade Mickey Ears101 Handmade Mickey Ears26K Total Shares
Live-Action BEAUTY AND THE BEAST Wedding InspirationLive-Action BEAUTY AND THE BEAST Wedding Inspiration12K Total Shares
This Company Has Created the Disney Princess Gowns of Our DreamsThis Company Has Created the Disney Princess Gowns of Our Dreams11K Total Shares
Add Disney Style to Your Island in Animal Crossing: New HorizonsAdd Disney Style to Your Island in Animal Crossing: New Horizons11K Total Shares

Copyright © 2021 Saccarzec Industries · Privacy Policy