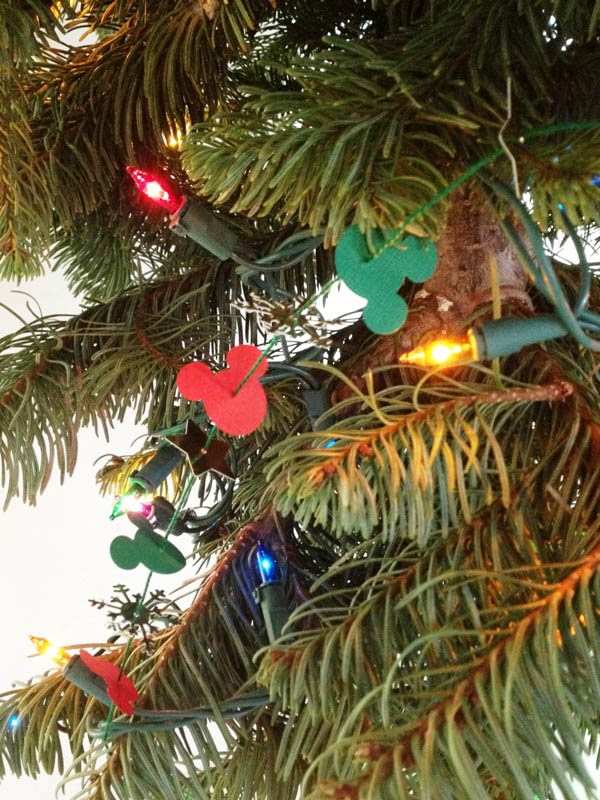
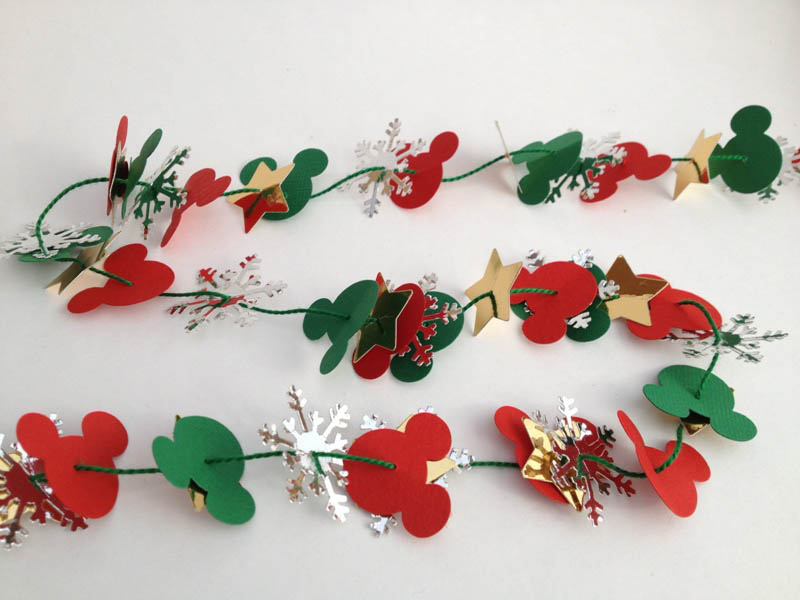
I have been wanting to make this easy Mickey garland for a few weeks now and I had all the supplies ready and just never got around to it. But when we finally got our tree last weekend, I knew I had to get my behind in gear! I spent the last couple days working on this while watching my evening sitcoms and now that it is on the tree I’m very happy with how it turned out. I call this “Easy Mickey Garland” because it’s no cut and no sew – all you need is a needle, yarn, and some paper punches. The most difficult part of this project is threading the needle. And this would be very easy to make for any occasion – just swap out the snowflake shape for something else and it’s perfect for birthday parties or baby showers.
Easy Mickey Garland
Supplies:
Yarn
Needle
Paper punches
Various colored scrapbook paper or double-sided foil paper
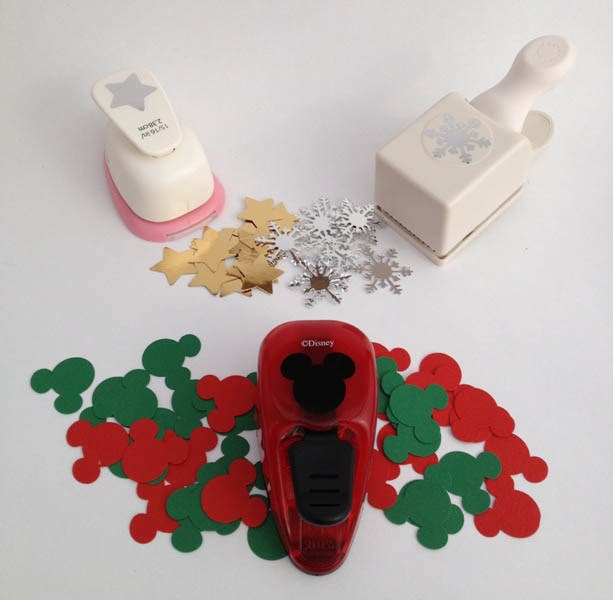
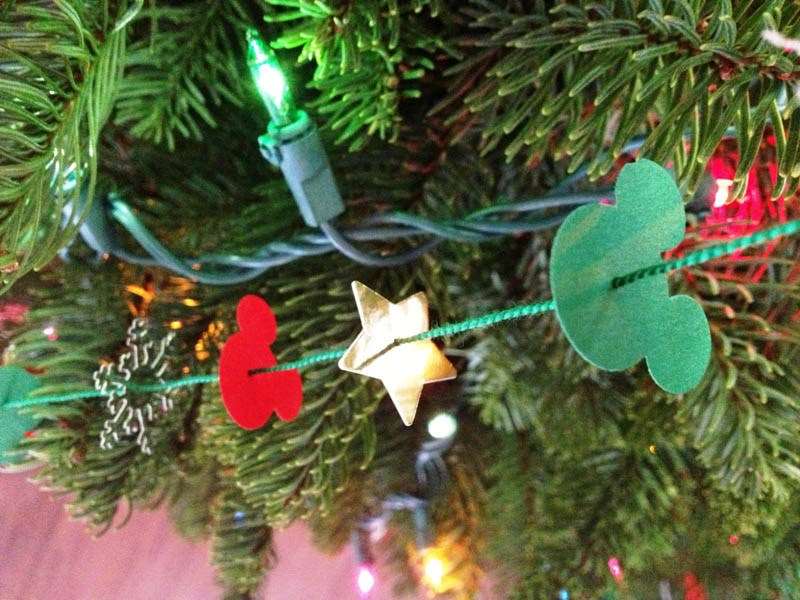
Step 1: Punch out your shapes. I had three shapes. I used gold foil paper for the stars, silver foil paper for the snowflakes, and green and red scrapbook paper for the Mickey heads.
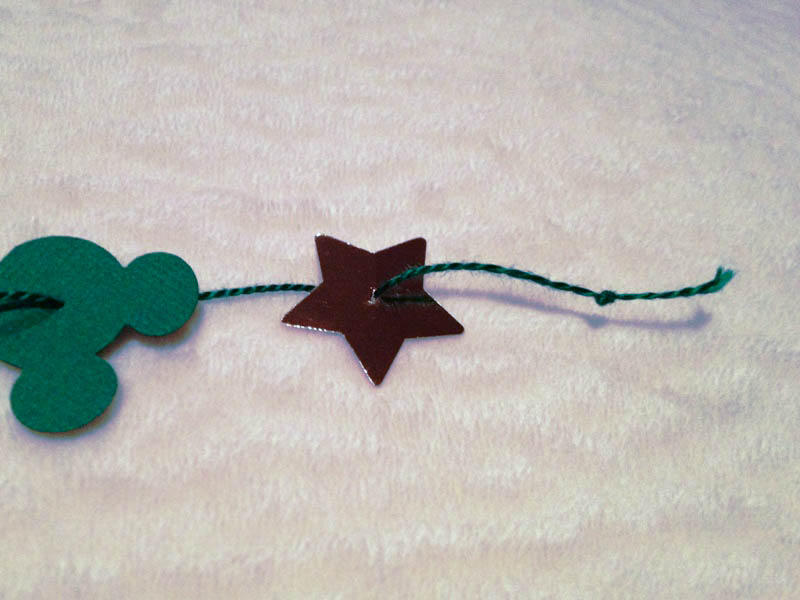
Step 2: Measure the amount of yarn you need. For this project, I wrapped the yarn around the tree as if I were displaying the finished project. This gave me a good idea of how much would be needed, then I added about 12 inches to be safe. Cut the yarn and knot it at one end (I forgot to knot the yarn before I started threading my shapes – oops!)
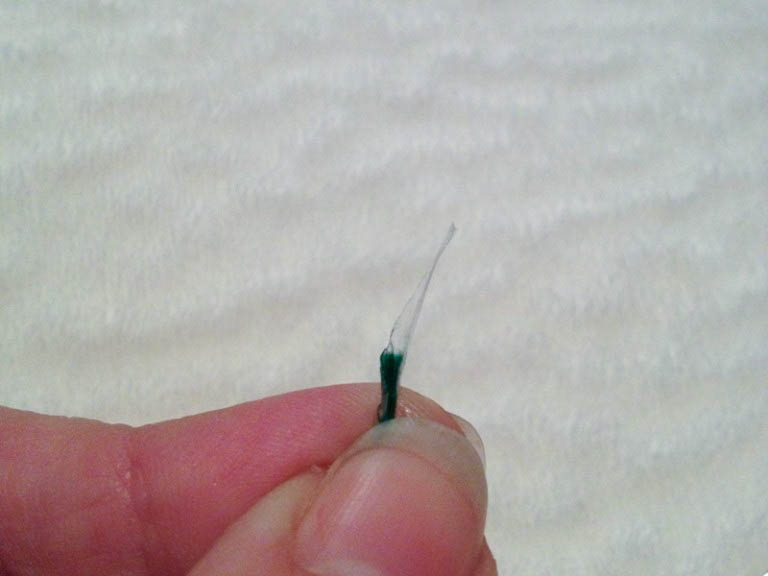
Here’s a little trick for threading thick yarn through a tiny needle’s eye: Wrap a small piece of tape around one end of the yarn, then cut the tape into a fine point. It’s a little difficult to describe, so I took a picture (above). It’s still tricky but once you get the pointed edge of the tape through the eye, you should be able to tug the yarn through. Then pull about a couple inches of slack and hold it tight as you’re threading the paper punches so it doesn’t go back through the needle eye.
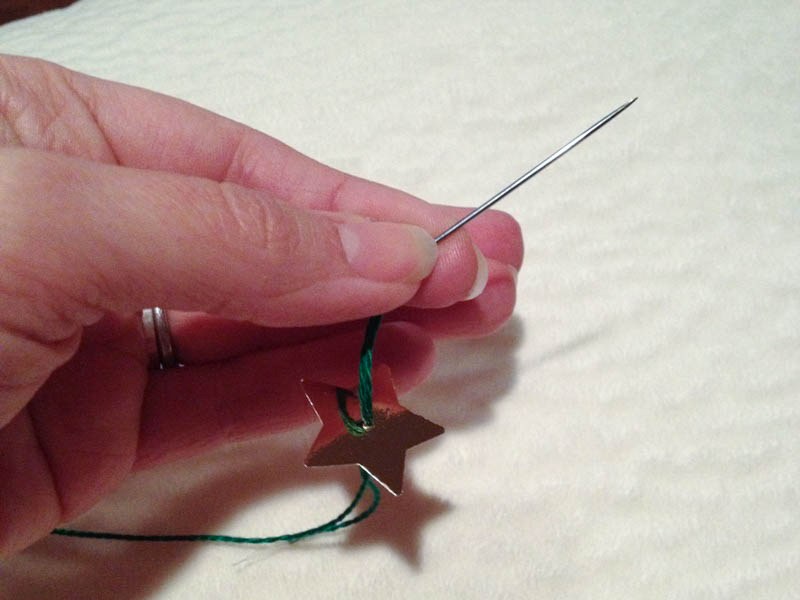
Step 3: Thread the paper punches with the needle and thread, then push the paper punch down the thread to the desired location. Repeat until all your paper punches are threaded and your garland is full! It’s up to you how you want to space your paper shapes. Mine are fairly close together but you can space them out as you wish.
Step 4: String your garland around your tree, or your mantle, or your door, or your desk … where ever you want to add a little bit of holiday happiness!
It’s tough for me to capture the full image on camera, but I love the way it looks on our tree! The lights catch on the foil stars and snowflakes and gives a little sparkle.