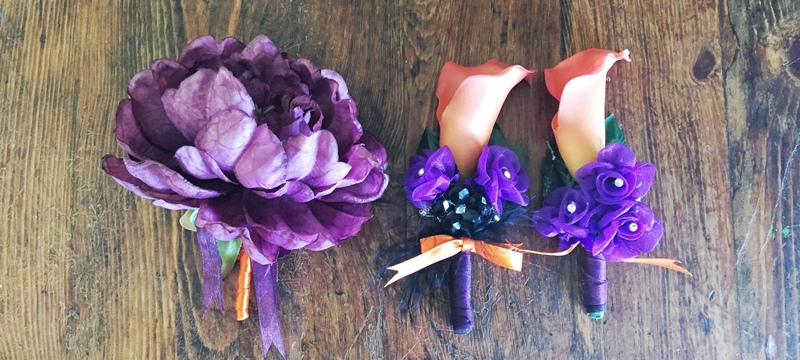
Sandra is planning an Escape wedding at Disney’s Grand Californian Hotel at the Wedding Garden and Brisa Courtyard.
Funding a wedding can be difficult and trying to cover the cost of everything can get expensive. Some couples resort to DIY – “do it yourself” – for some aspects of their event. For our wedding I decided to save money on flowers and made the boutonnieres for the groom and groomsmen myself for a fraction of the cost. Below are step-by-step instructions of how I made these beautiful boutonnieres, in case you are curious how to make your own!
I was able to purchase all my supplies at Hobby Lobby. I went when they had they had their silk flowers on sale for 50% off, and anything that wasn’t on sale I used the 40% coupon in the Hobby Lobby app. They even carry a little plastic box to put the boutonnieres in to protect them. I suggest getting one of those, too! You can find similar supplies at other craft stores such as Michael’s or Joann Fabric, or even on Amazon.
DIY Custom Boutonnieres for Your Wedding Party
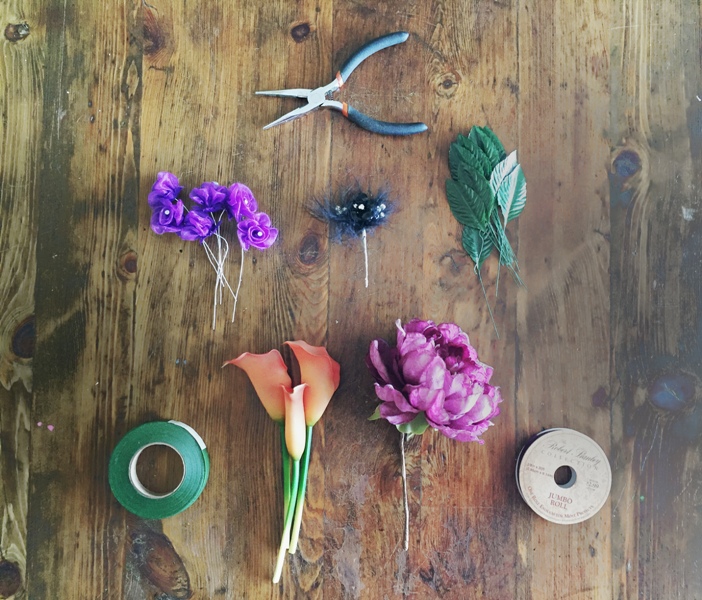
Supplies
Silk flowers of your choice (a variety of sizes is good but not too big)
Silk leaves for accents
Wire cutters
Tape measure or a ruler of some kind
Hot glue gun
Ribbon colors of your choice (measured and cut to 16 inches per bout)
1/4″ or 1/2″ green floral tape (approximately 16 inches per bout)
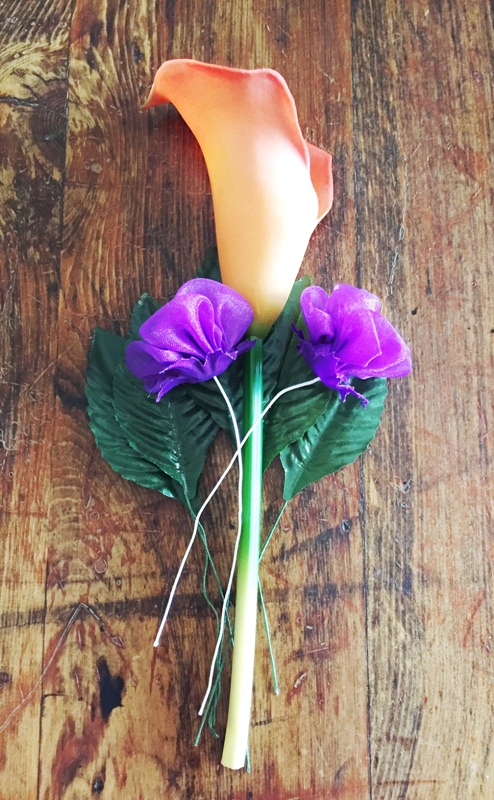
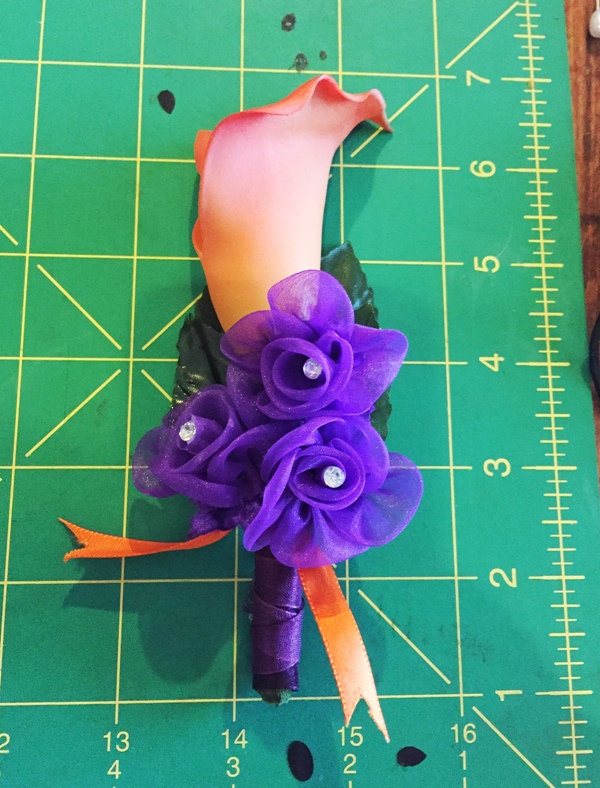
For this tutorial I’m starting with the groomsmen boutonnieres. The groomsmen will be wearing orange calla lilies to compliment the bridesmaids’ bouquets. As I go through this tutorial the same steps will apply to all boutonnieres. The groom’s boutonniere will be a little different, as you’ll see towards the end.
-
-
I started with five little floral leaves laid out on a table until I liked the way they looked. You can lay yours out however you see fit. Once my leaves looked satisfying to me, I placed the calla lily on top of the leaves, then added three purple accent flowers in a nice arrangement after that.
-
-
-
Once all the flowers and accents are arranged and grouped together, I used the floral tape (approximately 16 inches in length) starting at the center of the stems and carefully wrapped the tape to bind them together. The floral tape is sticky on both sides, but can also be removed easily if you make a mistake. It’s a little tricky to keep all the stems in place as you wrap that first one, but you’ll get the hang of it as you go along!
-
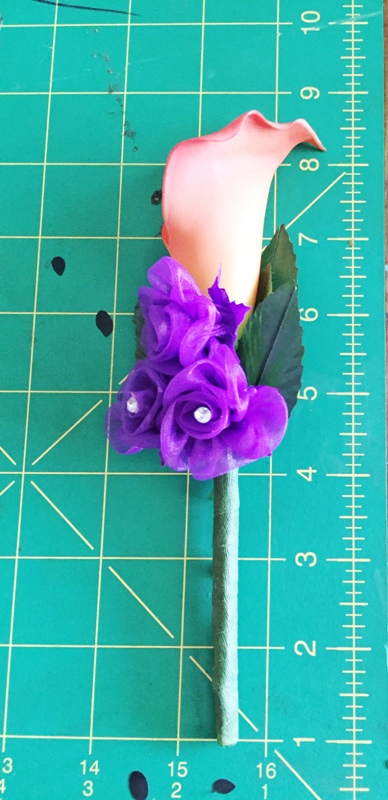
After the tape is wrapped around the stems and the stems are secure, you can cut off any excess tape. The tape is pretty sticky so you won’t need to add any glue to it. I put the boutonniere on my measuring mat (like the ones that are used for sewing, but you can use any ruler to measure) and measured the boutonniere to be about eight inches tall. It is a little too tall for my liking, so I cut about a inch off the bottom stem using the wire cutters. Now the boutonniere is about seven inches tall.
-
-
-
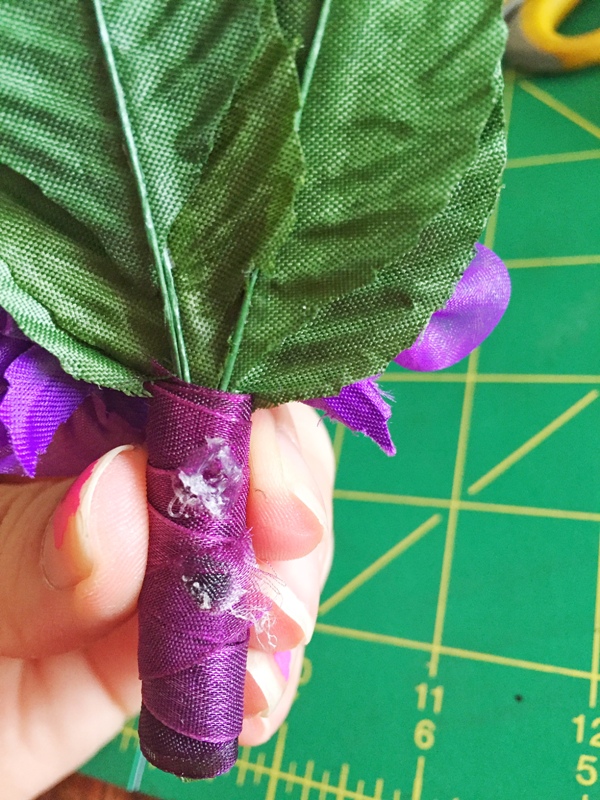
Now with your pre-cut ribbon, (mine is purple) I started wrapping the ribbon around the floral tape to cover it, starting in the middle working my way up the stem then down making sure to cover the very end of the stem, then back up again until I finished it with the end towards the back of the boutonniere. As I wrapped the ribbon, I pulled it taught to make it tight. With the end of the ribbon at the back of the boutonniere, use the hot glue to seal the ribbon. All you will need is a tiny drop to seal it. The back of the bout will be placed against the lapel of the jacket, so no one will see the glue.
-
-
-
You are almost finished! With the last ribbon I tied a knot at the base of the flowers and let each end of the ribbon just hang down. They will be longer than the boutonniere. Now you are going to cut one side of the ribbon to the length you desire. When you go to cut the ribbon start at one side and cut in a diagonal towards the middle, then do the same to the other side. This will give you a “V shaped” ribbon end, which looks a little fancier than just a straight cut. Repeat this process on the other ribbon strand. I had one strand longer than the other to give it a creative look. You can have them both even or uneven. Whatever appeals to you will work best. Then your project is complete! Repeat these steps for the next boutonniere until you have the number you need.
-
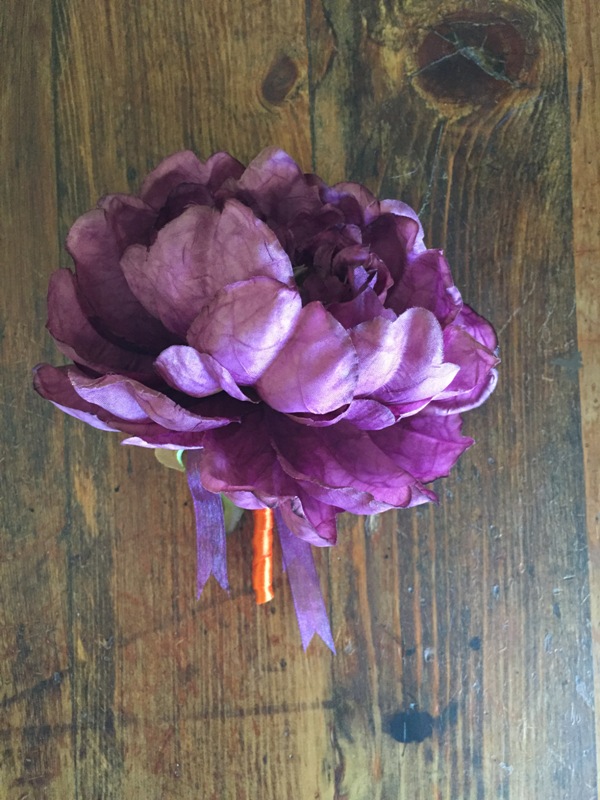
Grooms Boutonniere
To make my groom’s boutonniere, you would do steps 2-5. Because I choose an oversize flower for the groom, I didn’t feel that it needed any accent flowers. I want the flower itself to be the focal point.
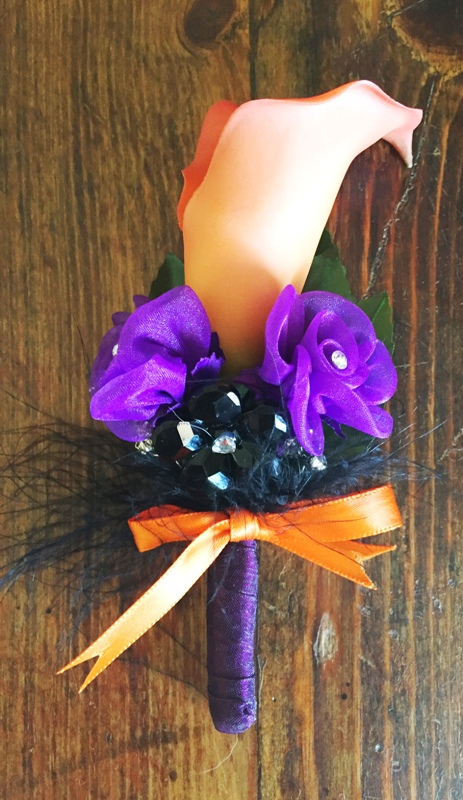
Best Mans Boutonniere
I wanted the Best Man’ss boutonniere to be set apart from the others (after all he is my step-son), so I replaced the middle purple flower with a black beaded flower and tied the ribbon into a bow instead.
I really enjoyed making these. They were really easy and I was able to make these three in less than two hours. I am going to use the same process to make our parents their own boutonnieres as well. What I love most about these is that you can customize them to fit your wedding style any way you like. The next morning I had an idea to also add a Lego figure to the end of the boutonnieres for my son and stepson to add a unique touch that matched their personalities. The Ideas are endless, get creative!
Happy Crafting!